|
|
|
|||||||||||||||||||||||||||||||||||||||||||||||||||||||||||||||||||||||||||||||||||||||||||||||
|
||||||||||||||||||||
|
||||||||||||||||||||
|
||||||||||||||||||||
|
||||||||||||||||||||
|
1) |
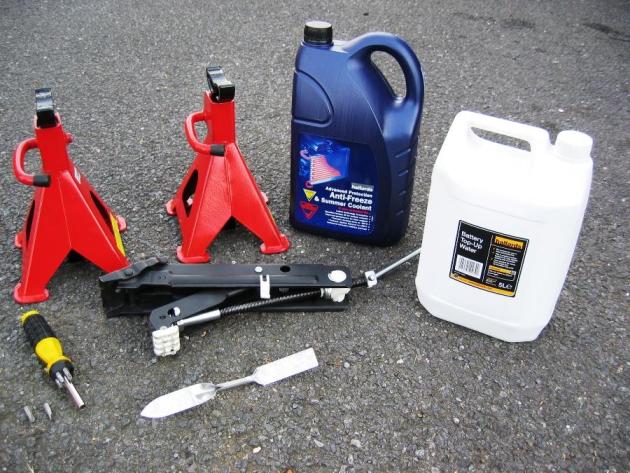
Assemble Your Kit +
Notes |
|
||||||||||||||||||
|
|
Below
is the total kit I used. As you can see, there aren't many tools required for
this job at all. The bottles are 5 liter each, however you only require about
2.5 liters of each to fill the Radiator. Change Duration: The Radiator should be flushed
no sooner than every 2 years. |
|
||||||||||||||||||
|
|
|
|
||||||||||||||||||
|
|
|
|||||||||||||||||||
|
2) |
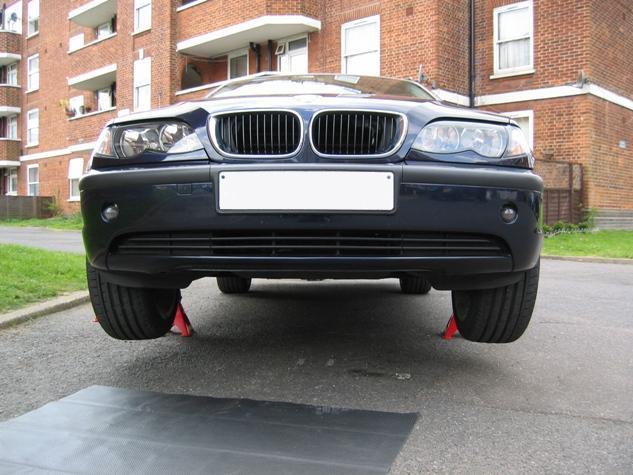
How It Looks |
|
||||||||||||||||||
|
|
Best
for it to be on 2 stands, so all the water can drain. Having
the car on Axle / Jack stands is optional. I used it as I could not get the
screw driver underneath the car to open the splash shield screws. If you have
a short Philips screw driver, then you should be able to get away with no
Axle / Jack stands. For
more details on lifting the car on Jack Stands, please refer to this page. |
|
||||||||||||||||||
|
|
|
|
||||||||||||||||||
|
|
|
|||||||||||||||||||
|
3) |
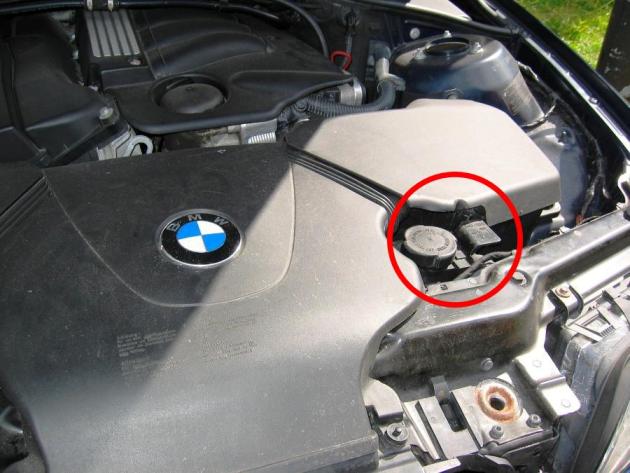
Radiator Cap Location |
|
||||||||||||||||||
|
|
Just to show the
location of the radiator cap and bleed / vent screw. |
|
||||||||||||||||||
|
|
|
|
||||||||||||||||||
|
|
|
|||||||||||||||||||
|
4) |
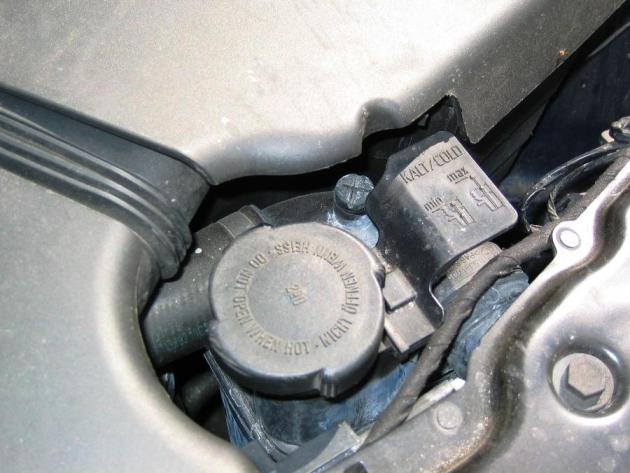
Radiator Cap And Black
Bleed Screw |
|
|||||||||||||||||
|
|
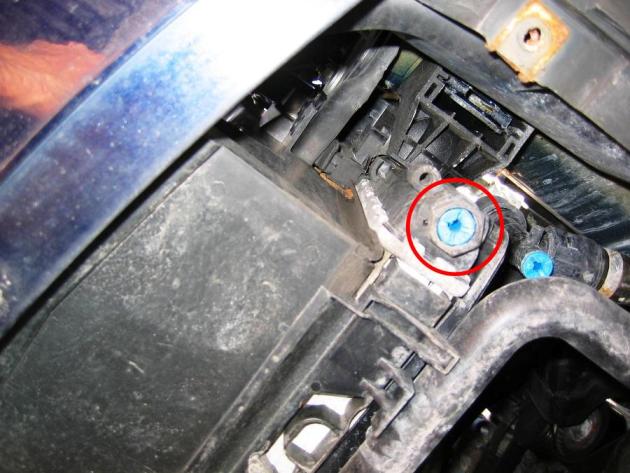
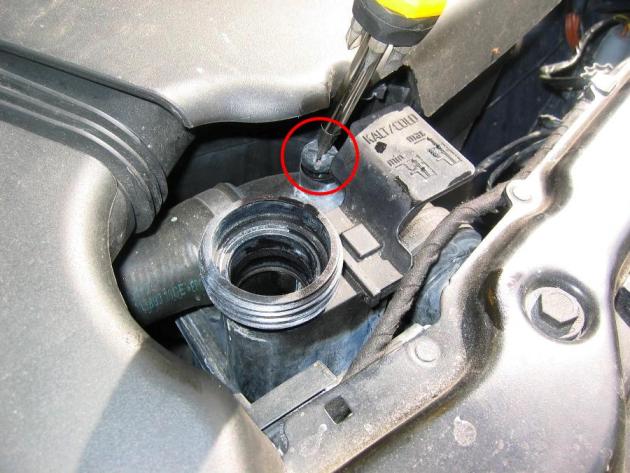
Close up of the Radiator cap and
the bleed / vent screw. |
|
|||||||||||||||||
|
|
|
|
|||||||||||||||||
|
|
|
||||||||||||||||||
|
5) |
Engine Splash Shield |
|
||||||||||||||||||
|
|
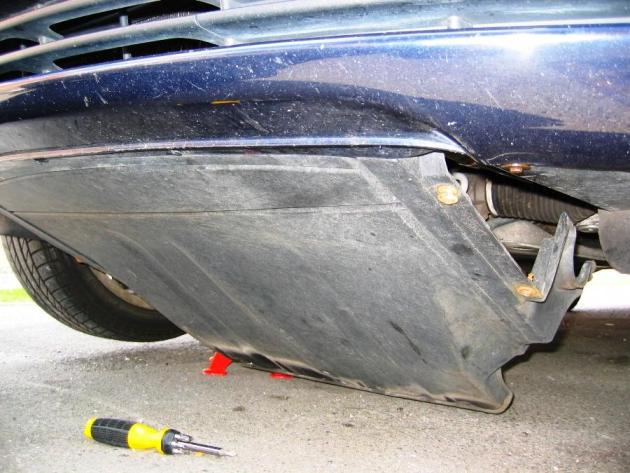
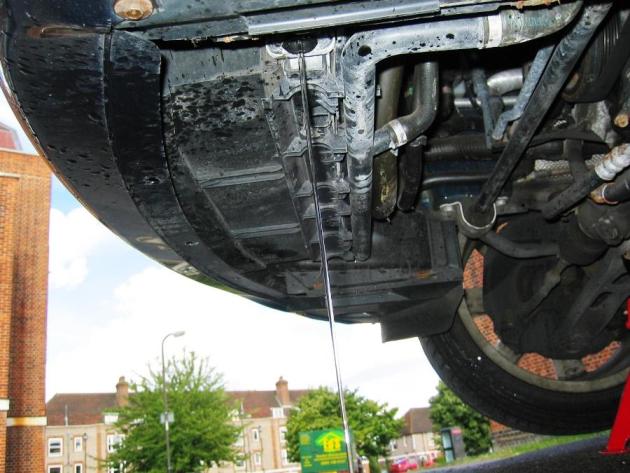
This is the splash shield
from underneath the car. This is to show where and how many screws and clips
/ Expanding Rivets are located. |
|
||||||||||||||||||
|
|
|
|
||||||||||||||||||
|
|
|
|||||||||||||||||||
|
6) |
Splash Shield Being
Removed |
|
|||||||||||||||||
|
|
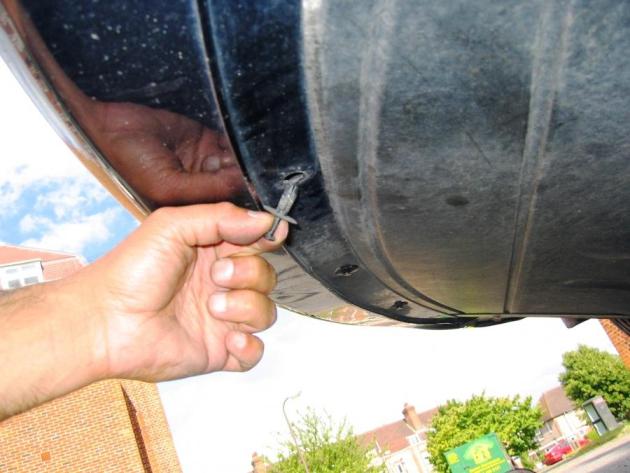
Splash Shield in the
process of being removed, using the flat head screwdriver for the front
Expanding Rivets and the Philips head screwdriver for the remaining screws. |
|
|||||||||||||||||
|
|
|
|
|||||||||||||||||
|
|
|
||||||||||||||||||
|
7) |
Shield Clip - Removal |
|
|||||||||||||||||
|
|
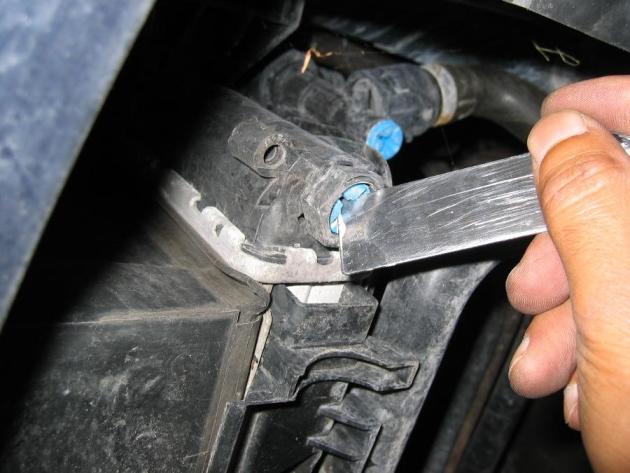
The front 3 Expanding
Rivets are a little odd. You need to first pull out the tin middle part all the
way out, then you can pull the rest of the clip out. |
|
|||||||||||||||||
|
|
|
|
|||||||||||||||||
|
|
|
||||||||||||||||||
|
8) |
Splash Shield Expanding
Rivet |
|
||||||||||||||||||
|
|
This is a photo of the
middle thin part of the Expanding Rivet pulled out. |
|
||||||||||||||||||
|
|
|
|
||||||||||||||||||
|
|
|
|||||||||||||||||||
|
9) |
Shield Expanding Rivet
Removed |
|
|||||||||||||||||
|
|
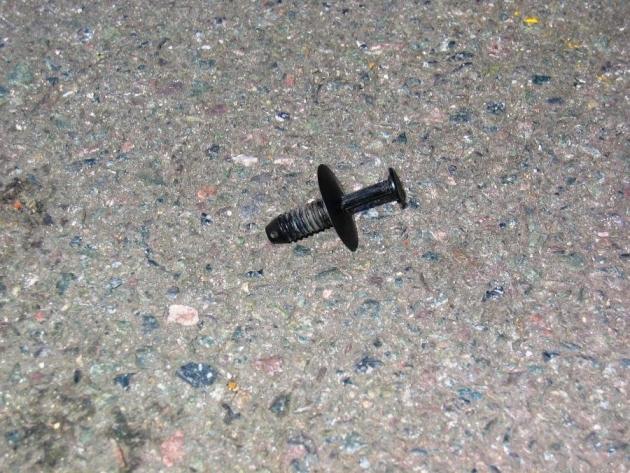
This is the actual
Expanding Rivet, removed. |
|
|||||||||||||||||
|
|
|
|
|||||||||||||||||
|
|
|
||||||||||||||||||
|
10) |
Remove Radiator Cap |
|
|||||||||||||||||
|
|
To begin the process or
draining the radiator, first open the Radiator cap. |
|
|||||||||||||||||
|
|
|
|
|||||||||||||||||
|
|
|
||||||||||||||||||
|
11) |
Remove Big Blue Drain
Plug |
||||||||||||||||||
|
|
Next get underneath
the engine / car where the splash shield was removed and locate the big blue
drain plug. |
||||||||||||||||||
|
|
|
||||||||||||||||||
|
|
|||||||||||||||||||
|
12) |
How to Remove Blue Drain
Plug |
|||||||||||||||||||
|
|
Open
and remove this drain plug with a similar tool or flat head screw driver and
watch for the water that starts pouring out immediately. Also make sure the
drain plug does not get lost. |
|||||||||||||||||||
|
|
|
|||||||||||||||||||
|
|
||||||||||||||||||||
|
13) |
Loosening The Smaller
Blue Drain Plug |
|||||||||||||||||||
|
|
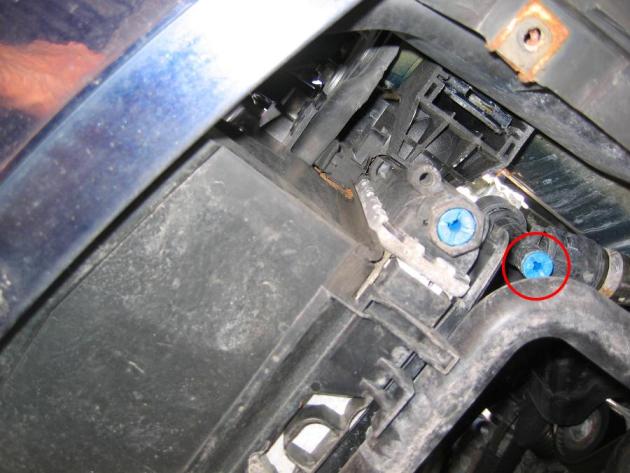
Only
loosen this second smaller blue drain plug (turn it a couple of times round with
a flat head screw driver) and let the remaining water drip out. |
|||||||||||||||||||
|
|
|
|||||||||||||||||||
|
|
||||||||||||||||||||
|
14) |
Radiator - Draining |
|||||||||||||||||||
|
|
Demonstrating
how the water & coolant mix pours out. NOTE: Coolant
is poisonous, if any leaks on to the ground, wash it away with water. As it
is sweet, animals tend to drink / lick it. |
|||||||||||||||||||
|
|
|
|||||||||||||||||||
|
|
||||||||||||||||||||
|
15) |
Radiator – Bleeding |
|||||||||||||||||||
|
|
Now to bleed the
radiator to enable all the water to come out, turn the black bleed / vent
screw a few times to loosen it, with a flat head screw driver. |
|||||||||||||||||||
|
|
|
|||||||||||||||||||
|
|
||||||||||||||||||||
|
16) |
Radiator - Flushing |
|||||||||||||||||||
|
|
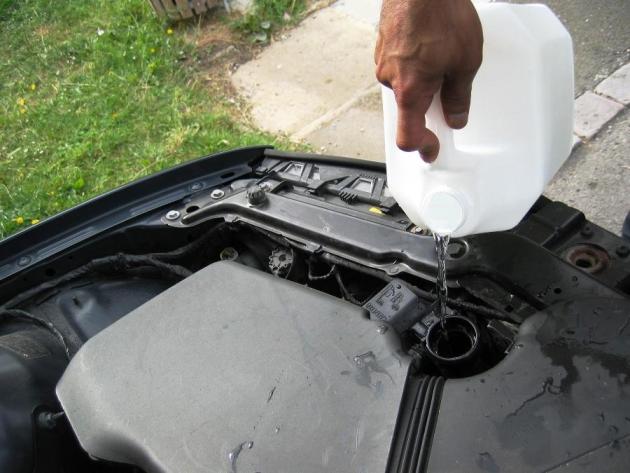
Next
fit the big blue drain plug back and also the smaller blue drain plug (but
not too tight, as you may damage them) and fill the radiator with water. I
used tap water myself, but if you prefer, you could use distilled water. Next
close the radiator cap and tighten the black bleed / vent screw and either
take the car for a short drive or start the engine and rev it a for a few
minutes. This will enable the water to mix with / dilute any remaining old
coolant. NOTE: Do not over
tighten the bleed / vent screw, it will / can break in half...as happened to
me! |
|||||||||||||||||||
|
|
|
|||||||||||||||||||
|
|
||||||||||||||||||||
|
17) |
Filling Ionized Water |
|||||||||||||||||||
|
|
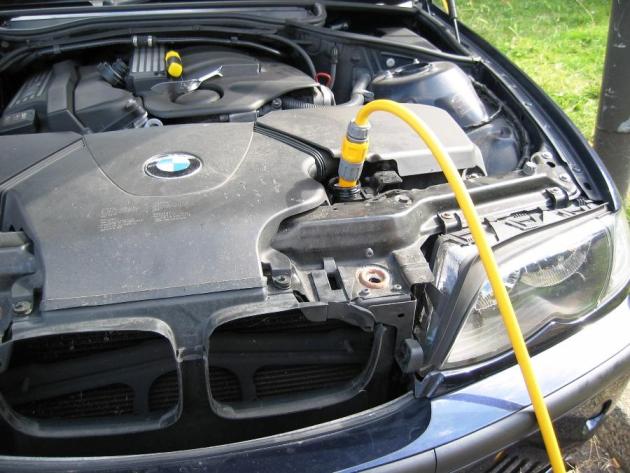
Make
sure the radiator isn't too hot, then slowly open the Radiator cap again
(with your face pointing in the other direction), open and remove the big
bottom blue drain plug again, loosen the smaller blue drain plug and then
loosen the top bleed / vent screw again. Then wait for all the water to drain
out, it may take about 10 minutes. Next
close and tighten the bottom blue drain plugs (not too tight). |
|||||||||||||||||||
|
|
|
|||||||||||||||||||
|
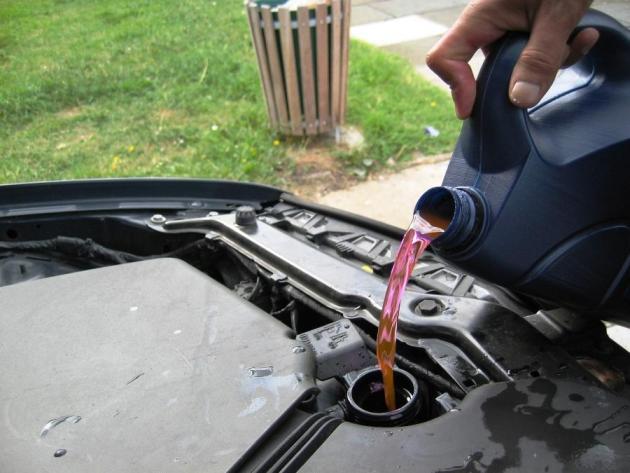
18) Filling Coolant Next pour about 2.5 liters of
Coolant into the Radiator
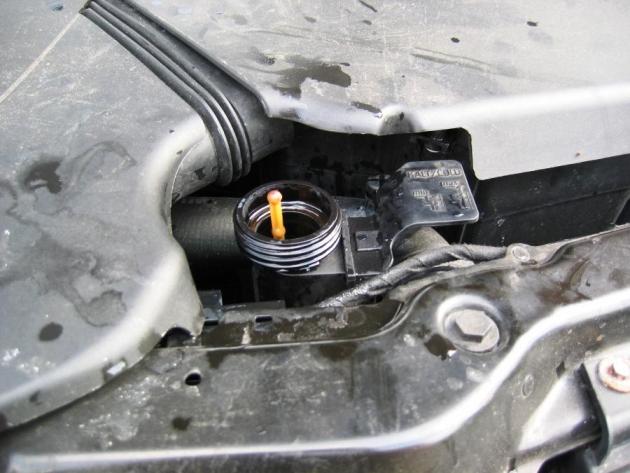
19) Radiator Full Pour until the orange stick sticks
out as below, indicating it is full.
20) Heating On Full Close the Radiator cap and tighten
the black bleed / vent screw next to it.
21) Radiator - Bleeding One you have done that, leave the
engine running and open the Radiator cap and loosen the black bleed / vent
screw until water starts coming out of the hole. Once satisfied, fix the splash
shield back to the bottom of the car, tighten the Radiator cap and tighten
the bleed / vent screw (again not too tight). One method to
tell if all the trapped air has been released is to ensure you are getting
constant hot air from your air vents inside the car.
21) Final Top off Water
& Coolant Once the car has
completely cooled down, open the radiator cap once again and top up the
radiator with water & coolant (till the yellow stick sticks out again),
as it will usually be required. |
||||||||||||||||||||
|
DIY Radiator Flush / Coolant Drain
by - imran hamid www.impee.co.uk |
|
|
