BMW 318ti (e36/5) Outer Door Handle Assembly Removal
Remove door panel by removing torx screw at the top of the inner door pull, under the mirror switch on the driver side or the cover plate on the passenger side. A second fillister head screw is located at the lower part of the door pull inside the recessed hole. Pull the door panel away from the door starting at one of the bottom corners. It is held in place by clips that pop into holes in the door. You will hear a loud pop when they come loose. Work around the bottom and side of the panel. The top side of the door panel slides straight up, held in by a different type of clip. Be careful of the door lock pin and the speaker wiring. Once the door panel is removed, carefully remove the foam liner. This will expose the inner door. (Door panel removal for e36 coupe/sedan is outline in the Bentley manual section 411)
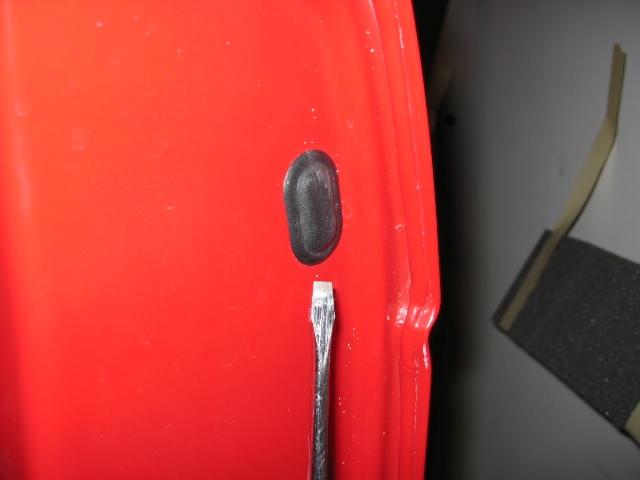
Make sure the window is up. Start by removing the black plastic oval plug at the end of the door. Either pry it off (watch the paint!) or try to push it out from the inside (very tight space!)
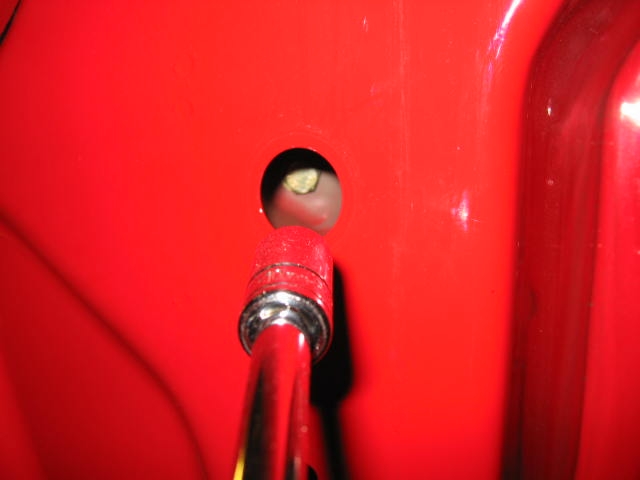
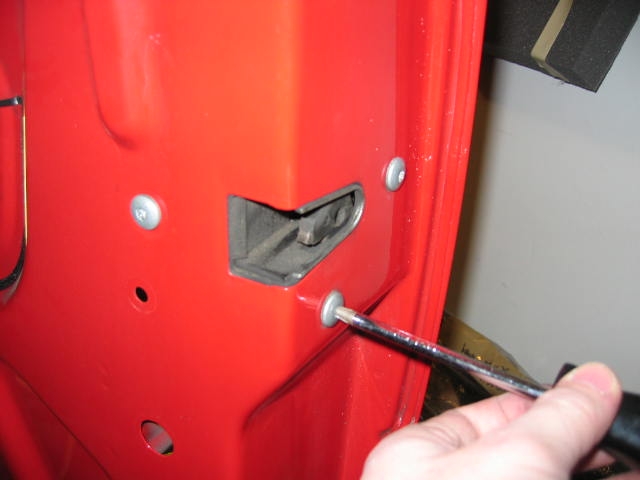
Inside the hole, there is a metal plate that slides forward to release the outer door handle trim piece. Use a rod to push it forward and remove the outer trim piece by tilting the top out and pulling up.


Remove the rear window channel guide.

Remove the electrical plug from the holder and disconnect it. Optionally, you can remove the plastic holder by rotating it 45 degrees (tilt the top towards the front of the car). This will give you more room to work, but I didn’t do it.

Unclip the retaining clip from the front door handle-mounting pin and remove the pin from the outside.


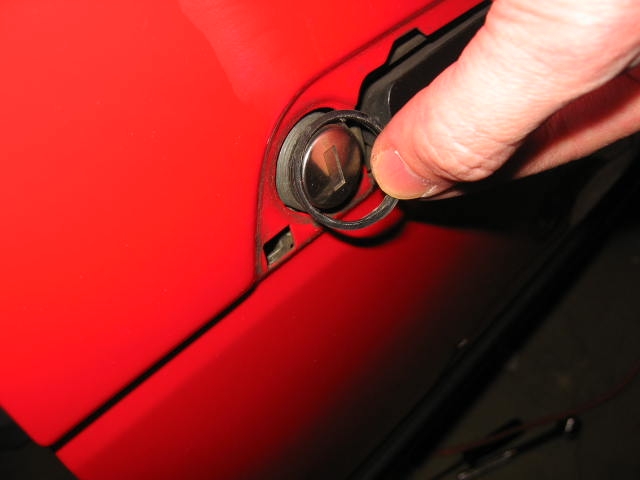
Using a watch case removal tool, remove the tumbler-retaining ring. Be careful, as it’s easy to slip and scratch the paint. If you don’t have this tool, I suppose you could use a small hammer and chisel to slowly knock the ring loose. This puts your paint in more danger. The tool is cheap on ebay. Be strong, steady, and take your time. It’s not worth making an ugly scratch in your door.

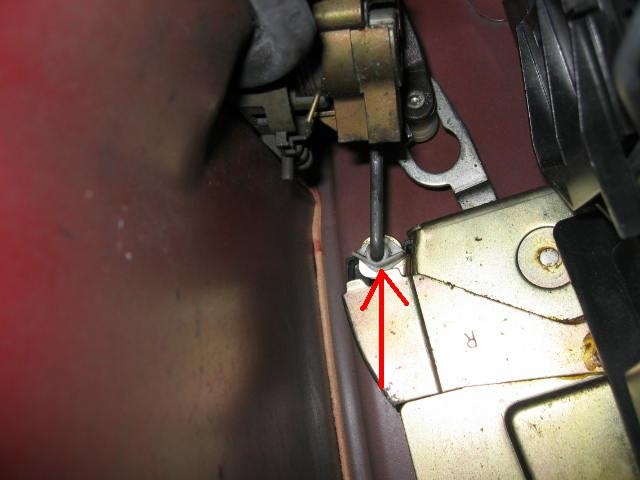
Look way back into the door. You’ll see a rod extending down to the door latch mechanism. This is the door lock actuator. You’ll need to insert your key into the door lock and turn it to lift this rod up to expose the plastic clip it connects to. Pull the rod straight back to unclip it.
There is a small plastic ring the goes between the tumbler and the door. Carefully remove it and place it in a safe place. If you don’t, it will fall onto the floor when you remove the door handle assembly and is easily lost.
Undo the three T-30 Torx screws securing the door latch mechanism. You don’t have to remove the latch mechanism, just free it enough to unhook it from the handle. See step #9 picture to see where it hooks on.
This should free up the handle from any physical connection to the door. Now you have to finesse the handle out from inside the door. I suggest lifting the handle assembly up in order to clear the two metal tabs that stick up near the bottom edge of the window. Then tilt the assembly inward to clear the tumbler and manipulate the swinging handle a bit and the assembly should come free. I can see why removing the window would make a bit more room, and in fact, this maybe necessary on the coupe and/or sedan. All I know is that I got both sides off with a minimum of difficulty with the windows in. It’s not trivial to remove the windows, so I am glad that at least in the ti, it’s possible.
Once removed, put the lock actuator rod onto the new assembly.

The shape of the electrical plugs was not identical on two assemblies, so it’s a trivial matter of sliding the plug retaining clip open to free the pins and to swap the plastic connector housings. The new assembly now plugs right in.

Put the new handle assembly in, again with a little finesse. Installation is the reverse of removal. The door lock actuator arm falls into the latch mechanism and is difficult to see, but it is just below the metal lip. Use a small “L” shaped allen wrench or similar device to fish the arm out. Then put the actuator rod back in (again, use your key to raise the rod to the right level).
*IMPORTANT* My new door handle assemblies came coded for my original car key. If you are replacing the handle with one from a different car that is obviously not coded to your key, I have read that swapping out the tumblers is not difficult.
Once everything is back in place (don’t forget the black plastic ring around the tumbler and inside the locking ring!), hold the outer trim piece in place and slide the locking plate rearwards. You can push from the inside with a screwdriver, or alternatively, you can use hooked metal rod thru the oval hole and pull it backwards (see Bentley Manual).

And that’s it!
